Jethro V1 AI Mouse Hardware Overview

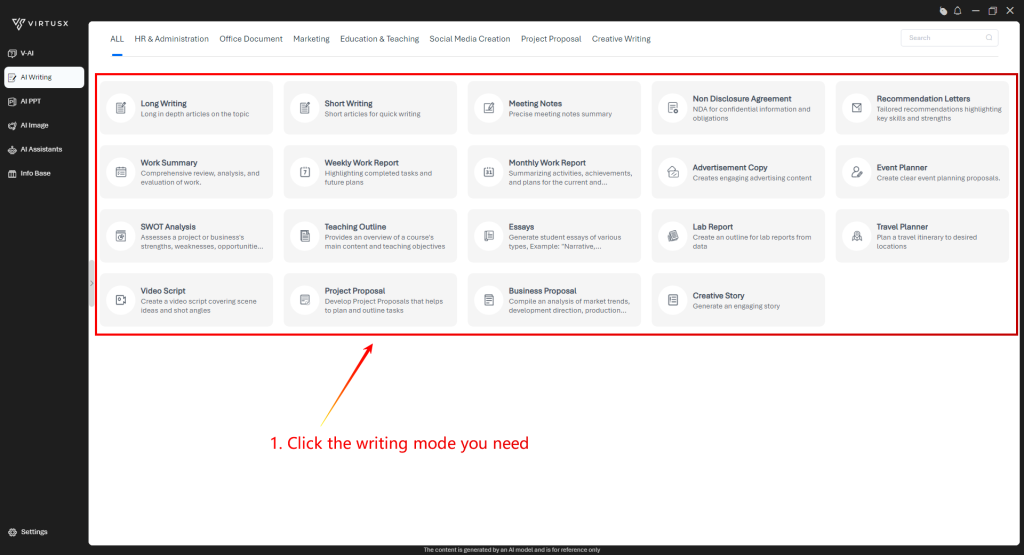
Hardware Setup
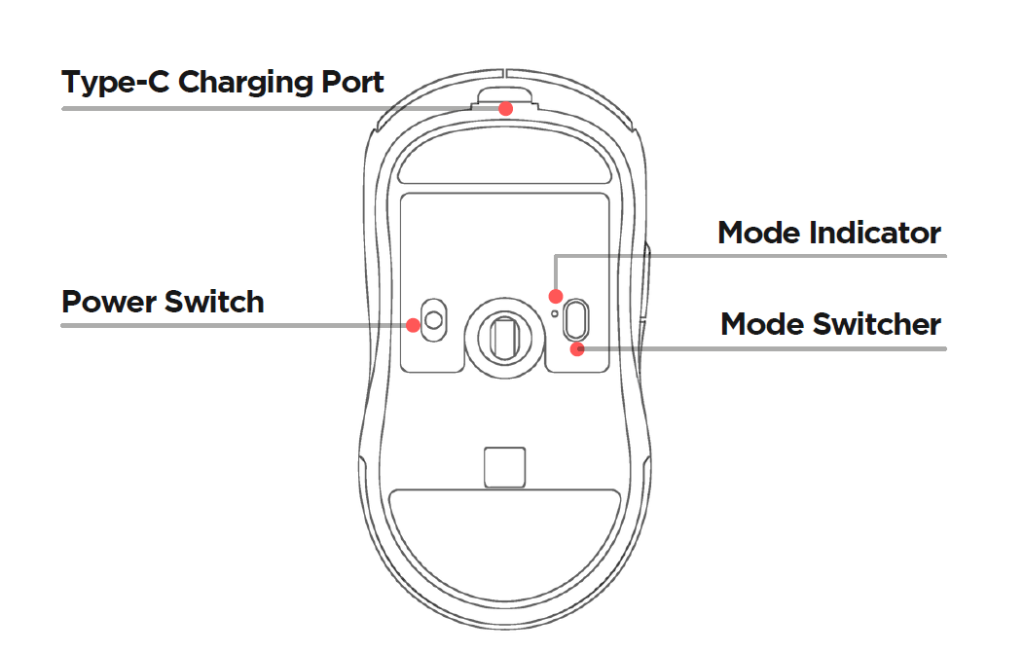
Charging the Mouse
Fast charging isn’t supported. Use the included USB-C cable for safe charging. It is recommended to connect the mouse to your computer for charging.
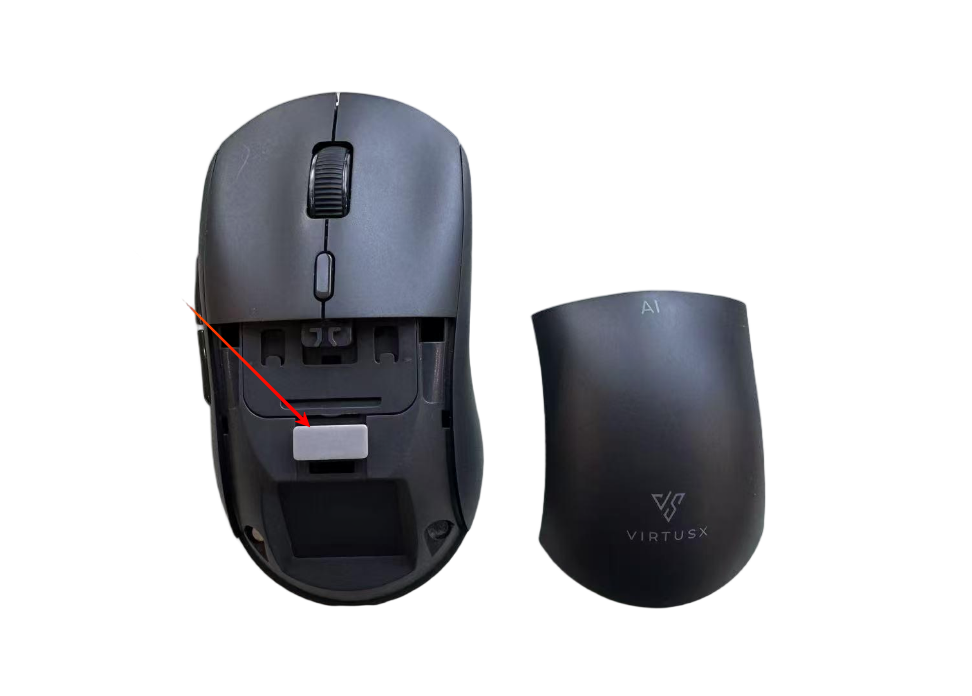
USB Receiver Location
The USB receiver is stored inside the mouse. Open the back cover to access it.
Multiple Connections
Connect up to 3 different devices. Use the button on the right side to switch between them. Different lights indicate each connected device.